
Time needed: about 10 minutes. Result: your first farm with a plot and its first activity.
If you are not signed in yet, open /login
Time needed: about 10 minutes. Result: your first farm with a plot and its first activity.
If you are not signed in yet, open /login
Public beta is now open. Sign up at /register, verify your email, then sign in.| Step | What you do | Where |
|---|---|---|
| 1 | Create a farm | /farm/new |
| 2 | Add a planting plot | Farm detail page |
| 3 | Record an activity or import a schedule | Plot detail page |
| 4 | Monitor the dashboard | /farm |
A farm is the top-level container in AgroDex Farm. One farm represents one area of land you manage.
| Field | Required? | Notes |
|---|---|---|
| Farm Name | Yes | For example Kepala Batas Farm |
| Mukim / Area | No | For example Sungai Dua |
| District | No | For example Seberang Perai Utara |
| State | No | For example Pulau Pinang |
| Area + Unit | No | Total area of the whole farm. The unit can be changed later |
| Supervisor (Manager) | No | Leave empty if you manage it yourself |
| Notes | No | Free-form notes |
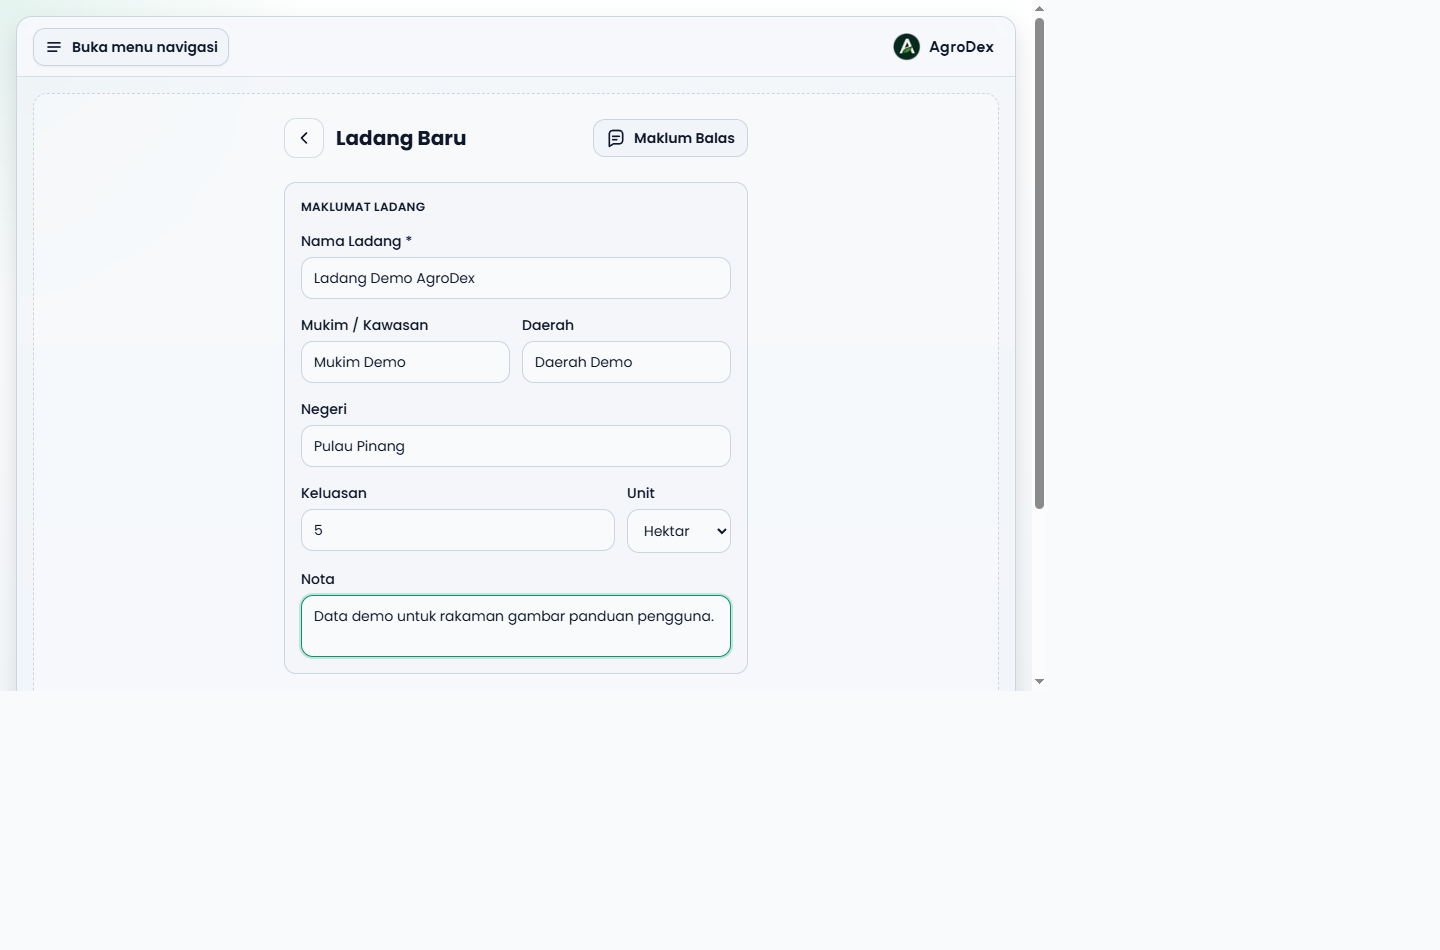
Important note about Supervisor (Manager). If you fill in this field, that person can see your farm and record activities. They cannot delete the farm or change the supervisor. Clear this field to revoke their access.
After saving, you land on the farm detail page.
A plot is a section within a farm. If your farm has four paddy blocks, create four plots. Each plot has its own crop, area, and plant date.
| Field | Required? | Notes |
|---|---|---|
| Plot Name | Yes | A name you understand. For example North Plot, Block A |
| Lot Number | No | The official lot number. For example Lot 1234, GM 456 |
| Crop | No | For example Paddy, Maize |
| Area + Unit | No | Area of this plot only |
| Plant Date | No | The date the current planting started |
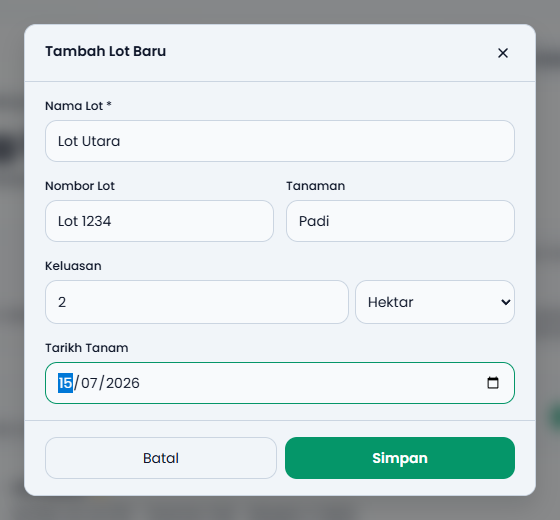
Tip: The plant date drives several useful features. The dashboard calculates crop age and estimates the harvest date, and the Crop Calendar knows which day you are on. Fill it in when you know the date.
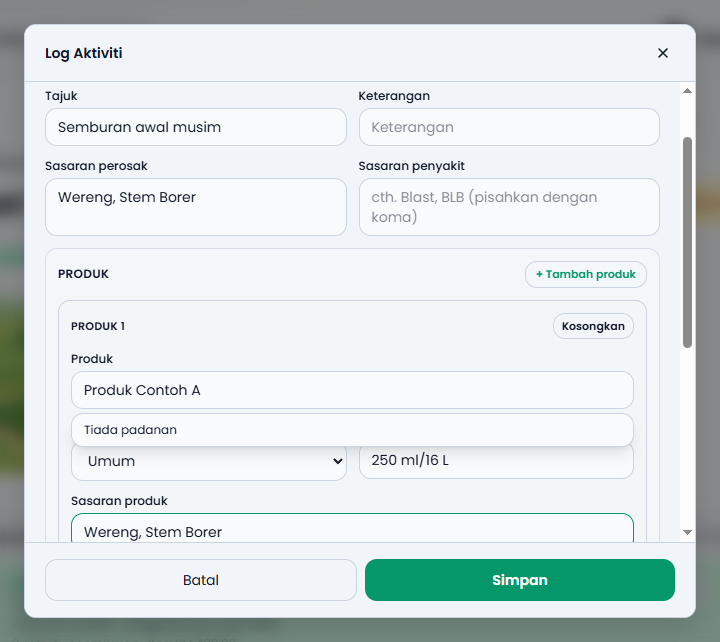
Open your plot, then choose one of two approaches.
Best for work you did today.
Best when you want an entire planting plan loaded at once.
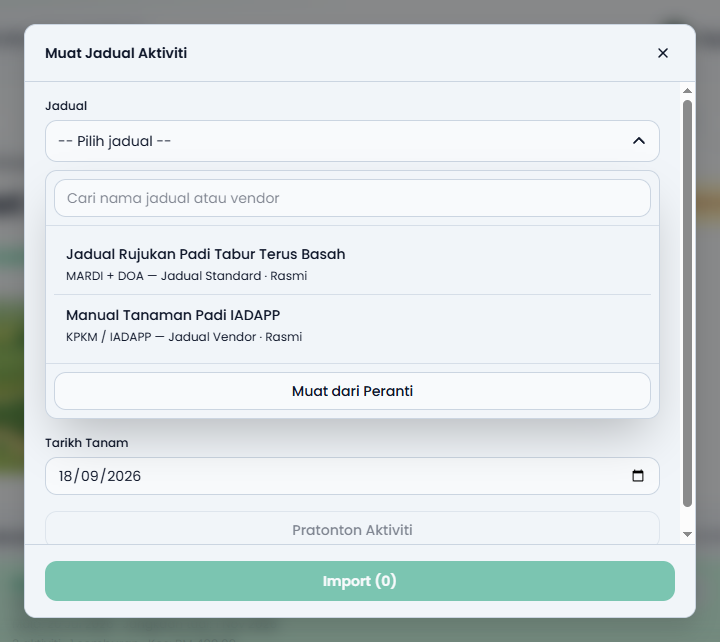
Important warning. Importing replaces activities from the previous schedule import for that plot. Activities you recorded manually are not deleted.
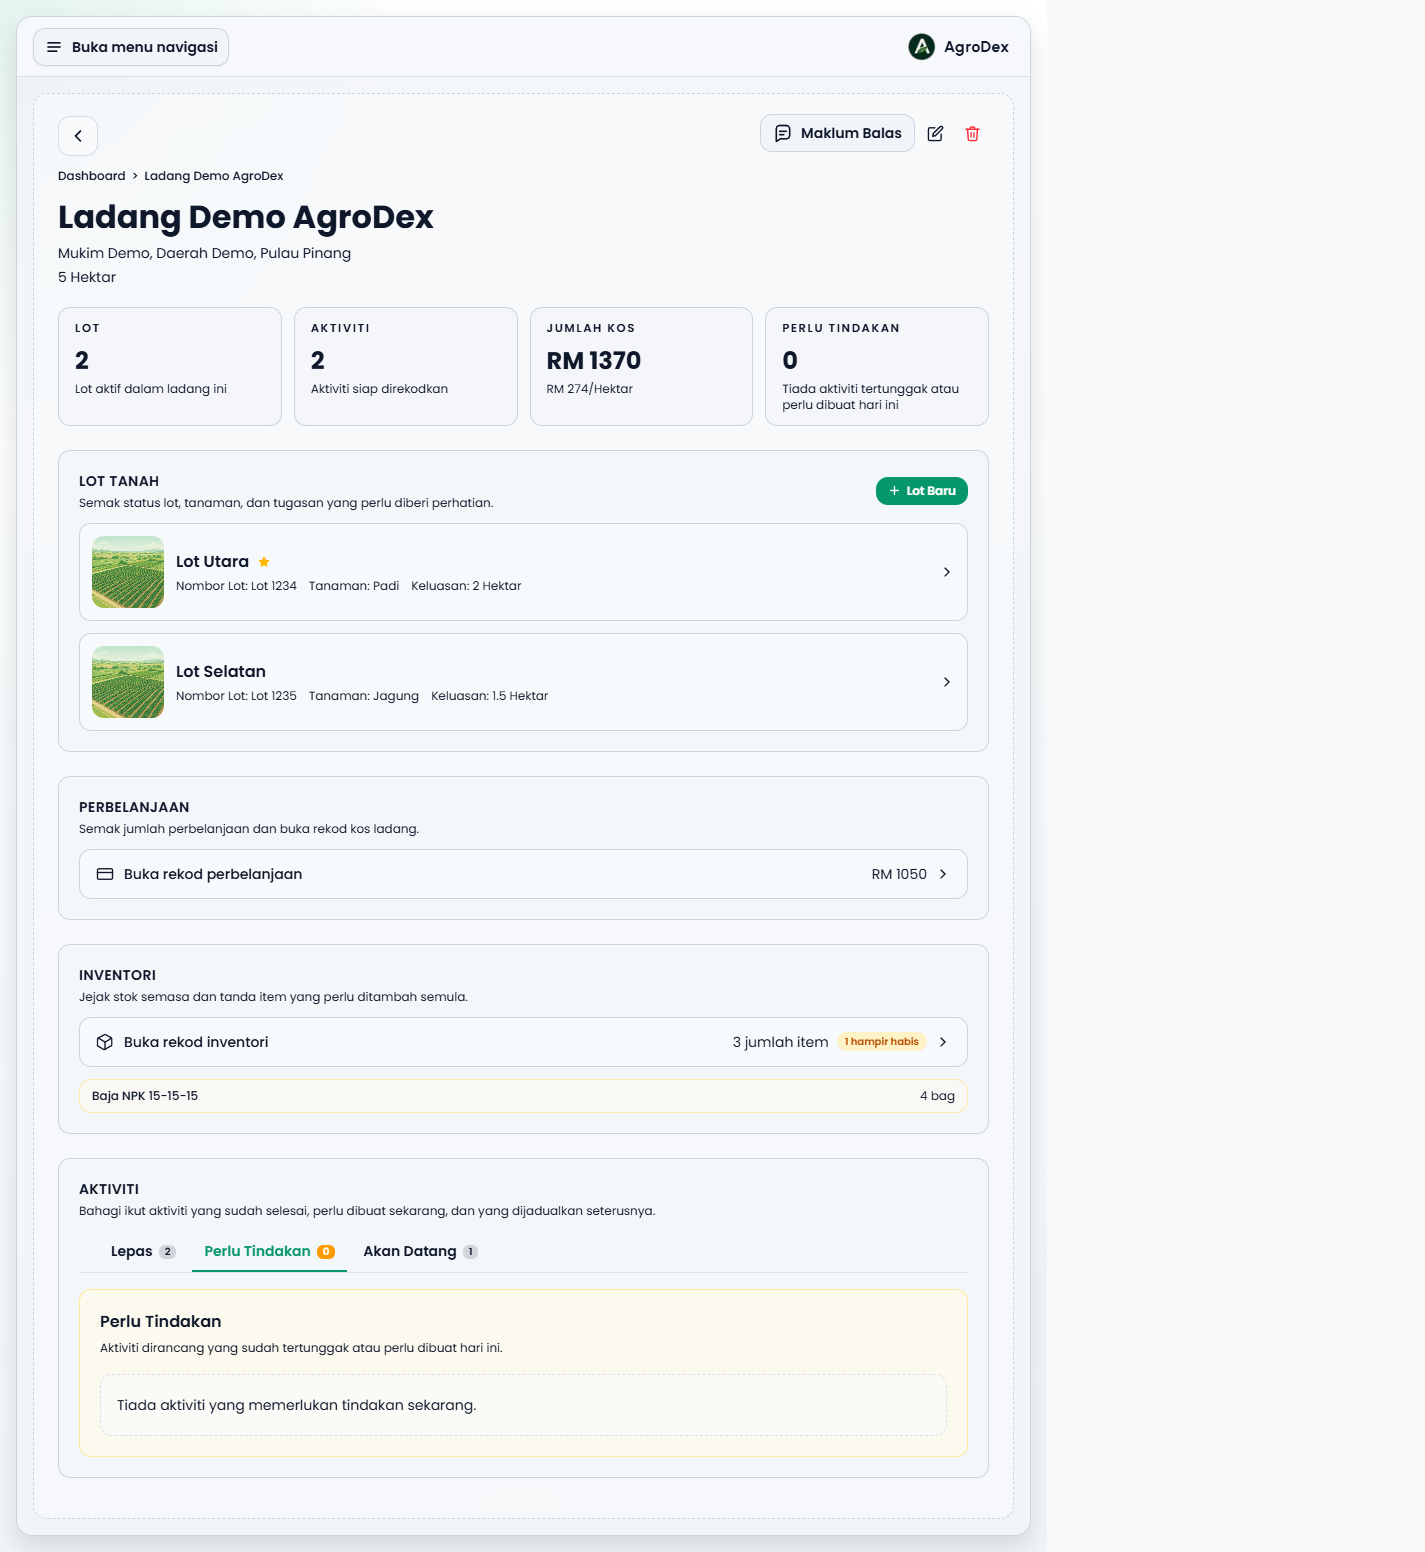
Go back to /farm. You will see:
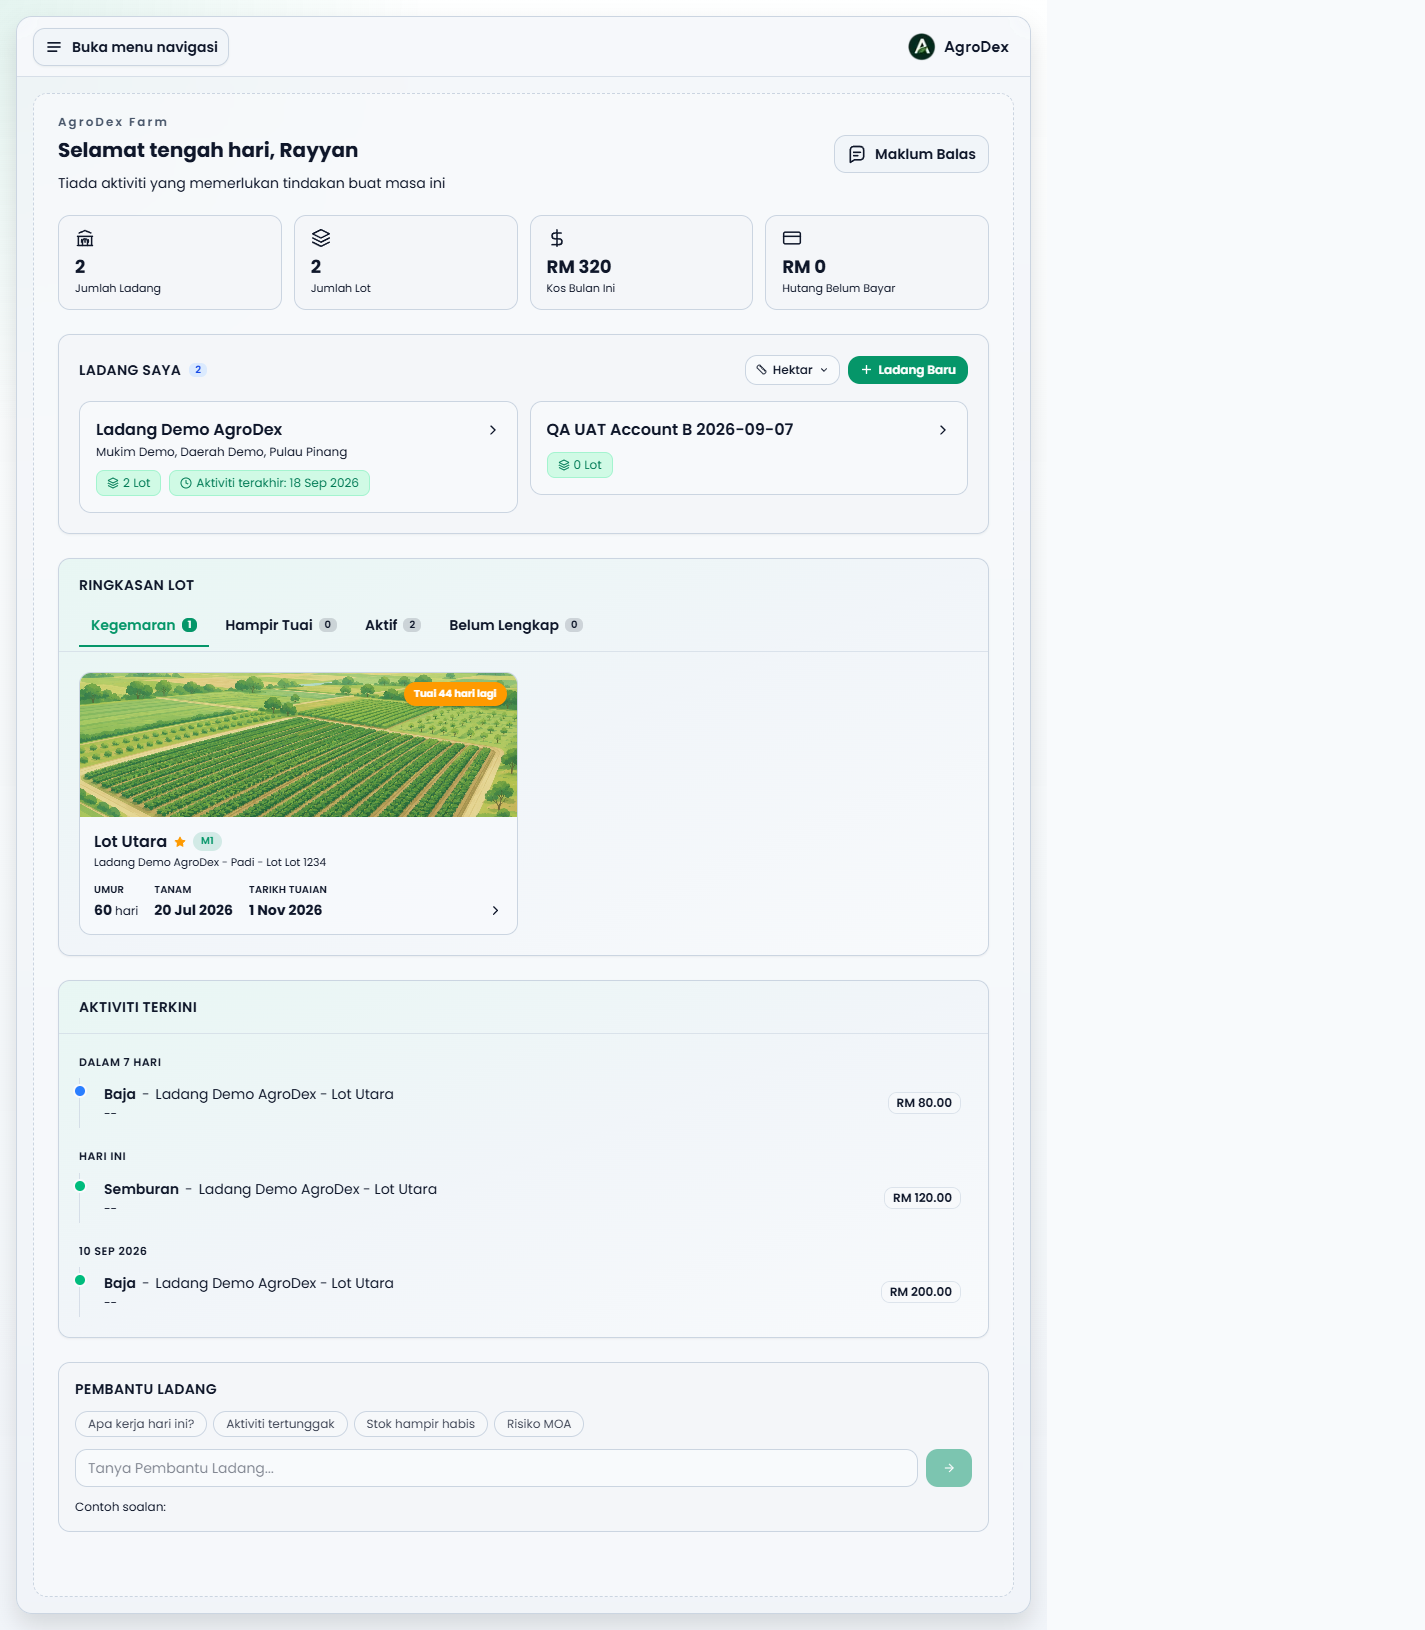
Mark important plots as Favorite (star icon) so they always show up on the dashboard.
Once your farm, plot, and first activity are in place, these three features are usually next:
| Feature | When to use it | Where |
|---|---|---|
| Expenses | Record pesticide, fertilizer, labour, and rent payments | /farm/[farm]/expenses |
| Inventory | Track pesticide and fertilizer stock in your shed | /farm/[farm]/inventory |
| Crop Seasons | Close a planting cycle and record the yield | Season panel in the plot detail page |
See the Farm FAQ, or send feedback using the feedback button in the app.
Next guide: Full Farm Guide